
Workspaces#
Workspaces are persistent spaces for users to work in using the various OSBv2 applications. Each workspace is saved on a persistent cloud volume, allowing users to save their work and resume it at a later time. Users can add files to workspaces from repositories, or uploaded them from their computers. Workspaces can be public, private, or featured.
private workspaces are only visible and accessible to the user that created them
public workspaces are visible to everyone but can only be modified by their creators (they can be opened in readonly mode by others)
featured workspaces are public workspaces that have been curated by the OSBv2 administrators
Working with existing workspaces#
All of these workspaces can be seen on the OSBv2 homepage in the right hand panel. Users can select the appropriate tab to switch between different types of workspaces.
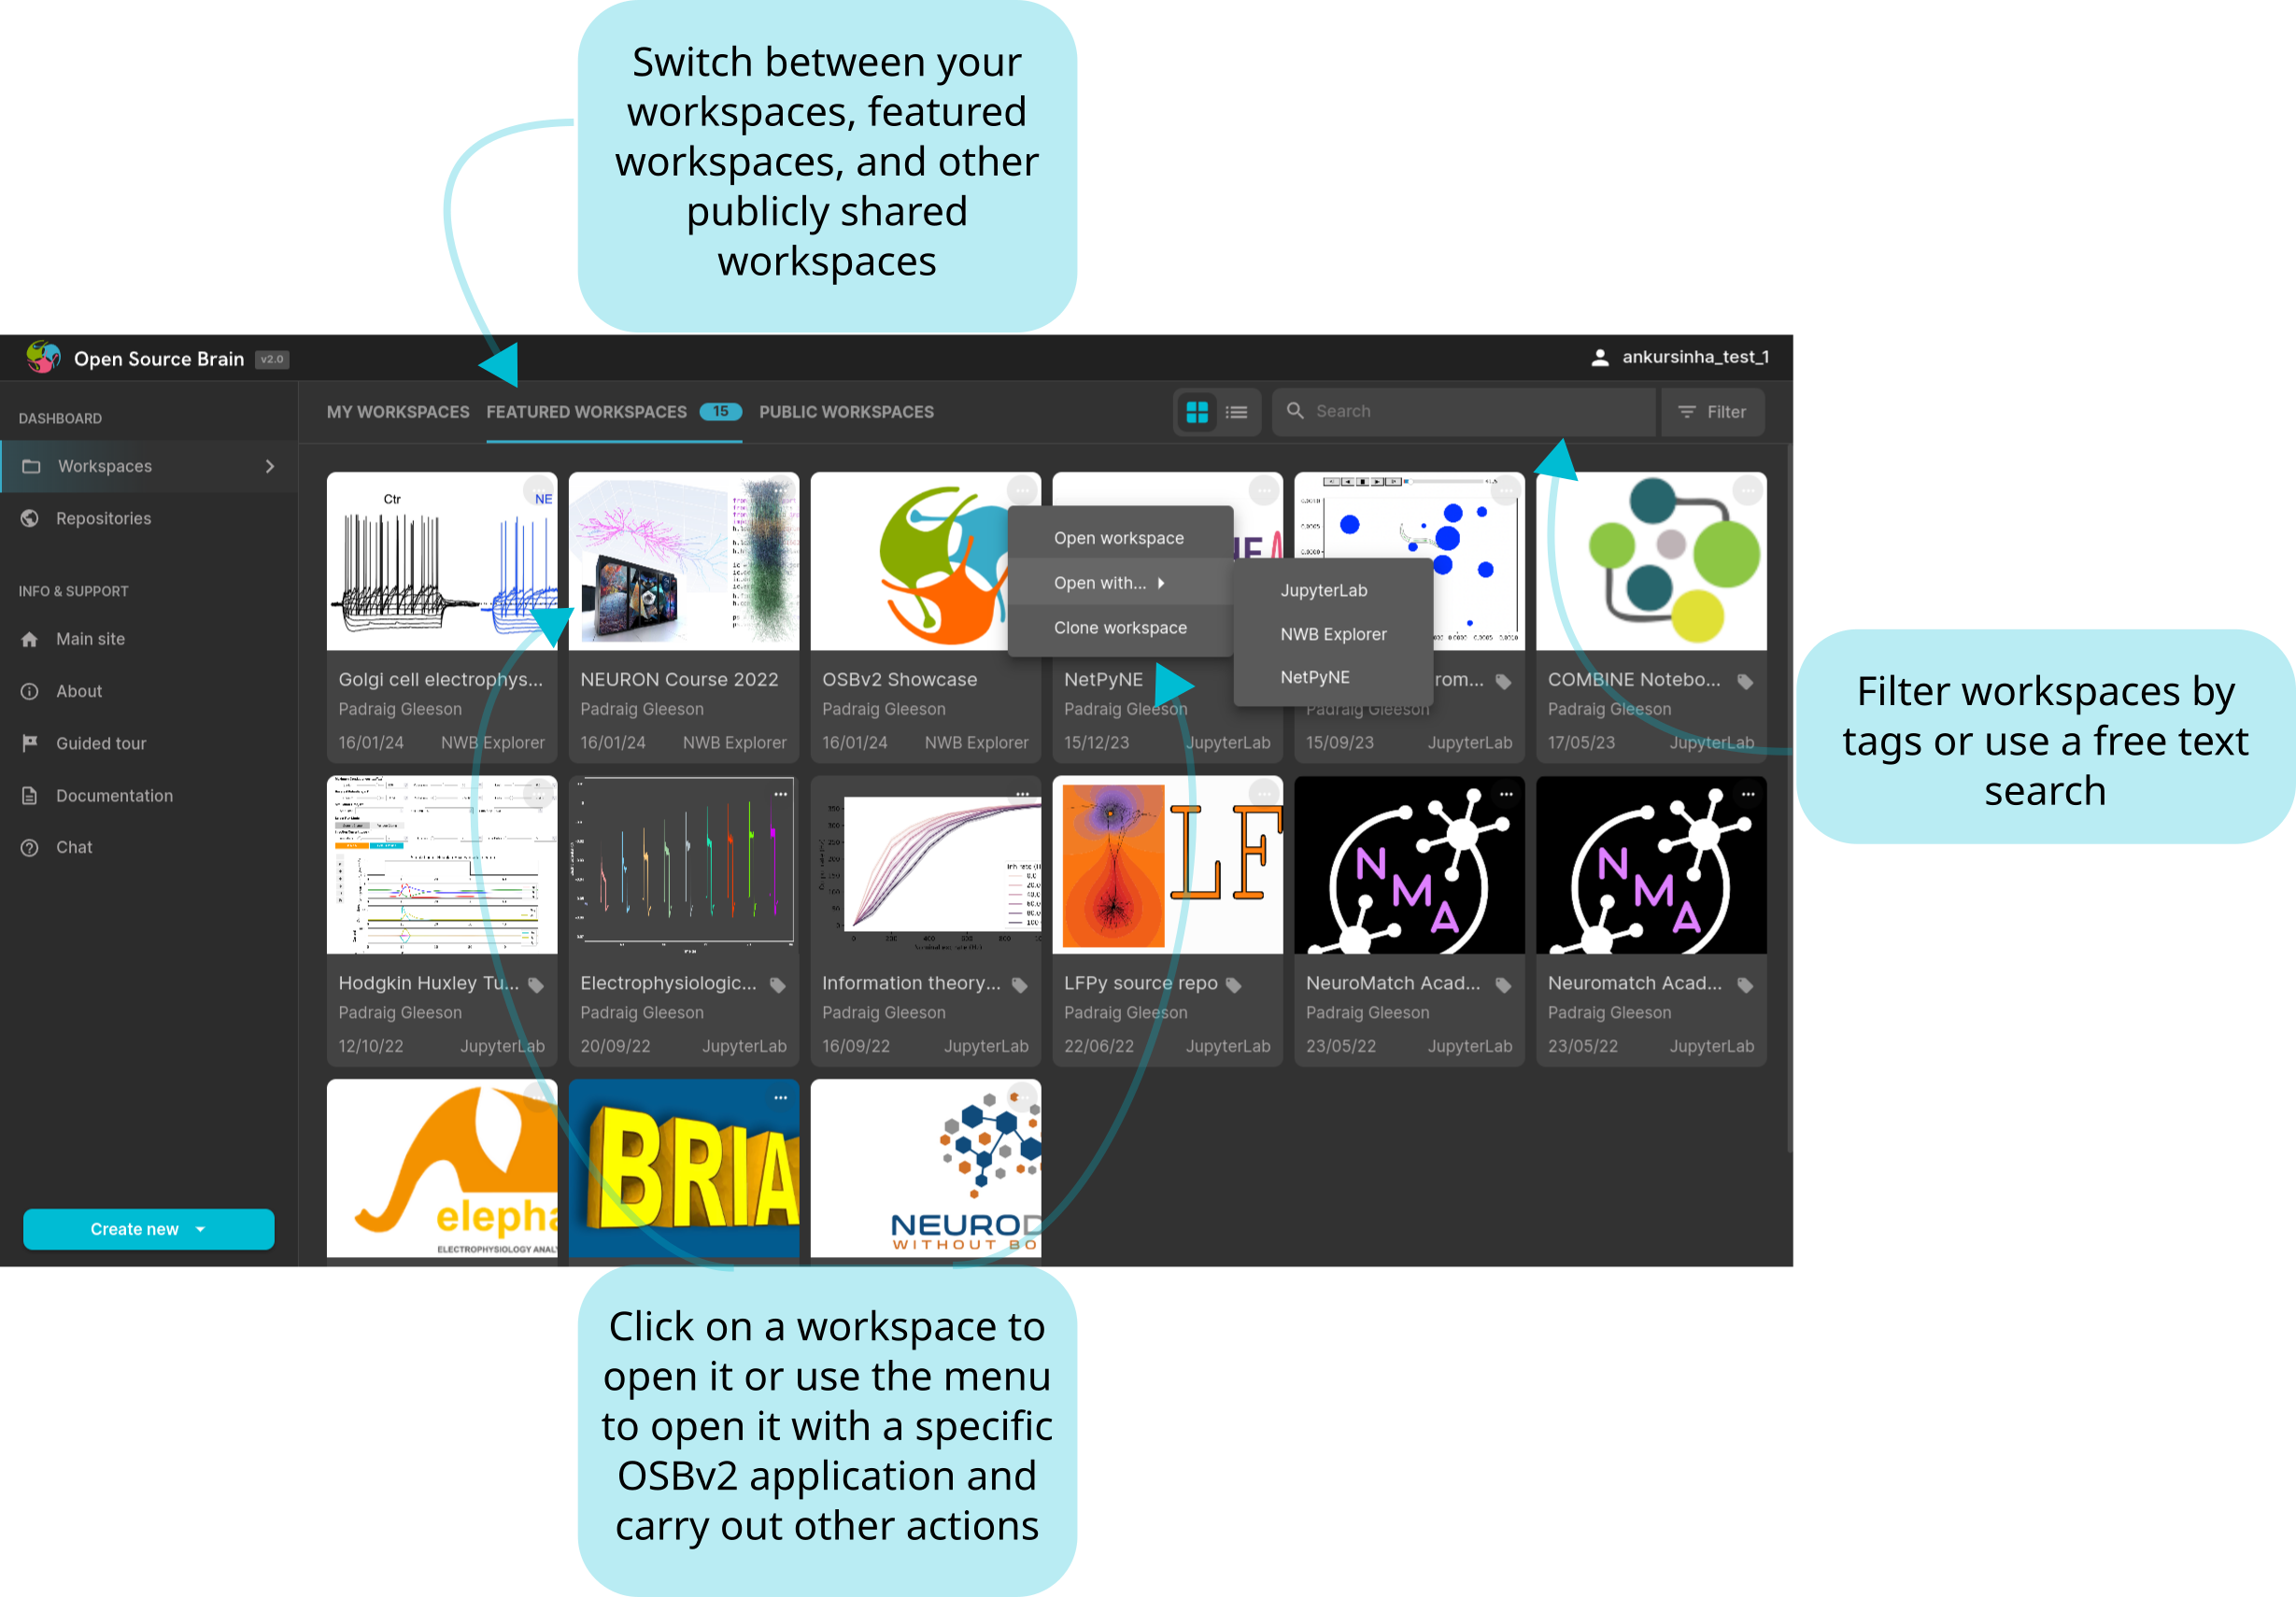
Fig. 7 Workspaces can be seen on the OSBv2 homepage.#
Workspaces can be opened in any of the OSBv2 applications. This can be done either directly from the homepage by using the context menu for each workspace in the list, or from the workspace information page.
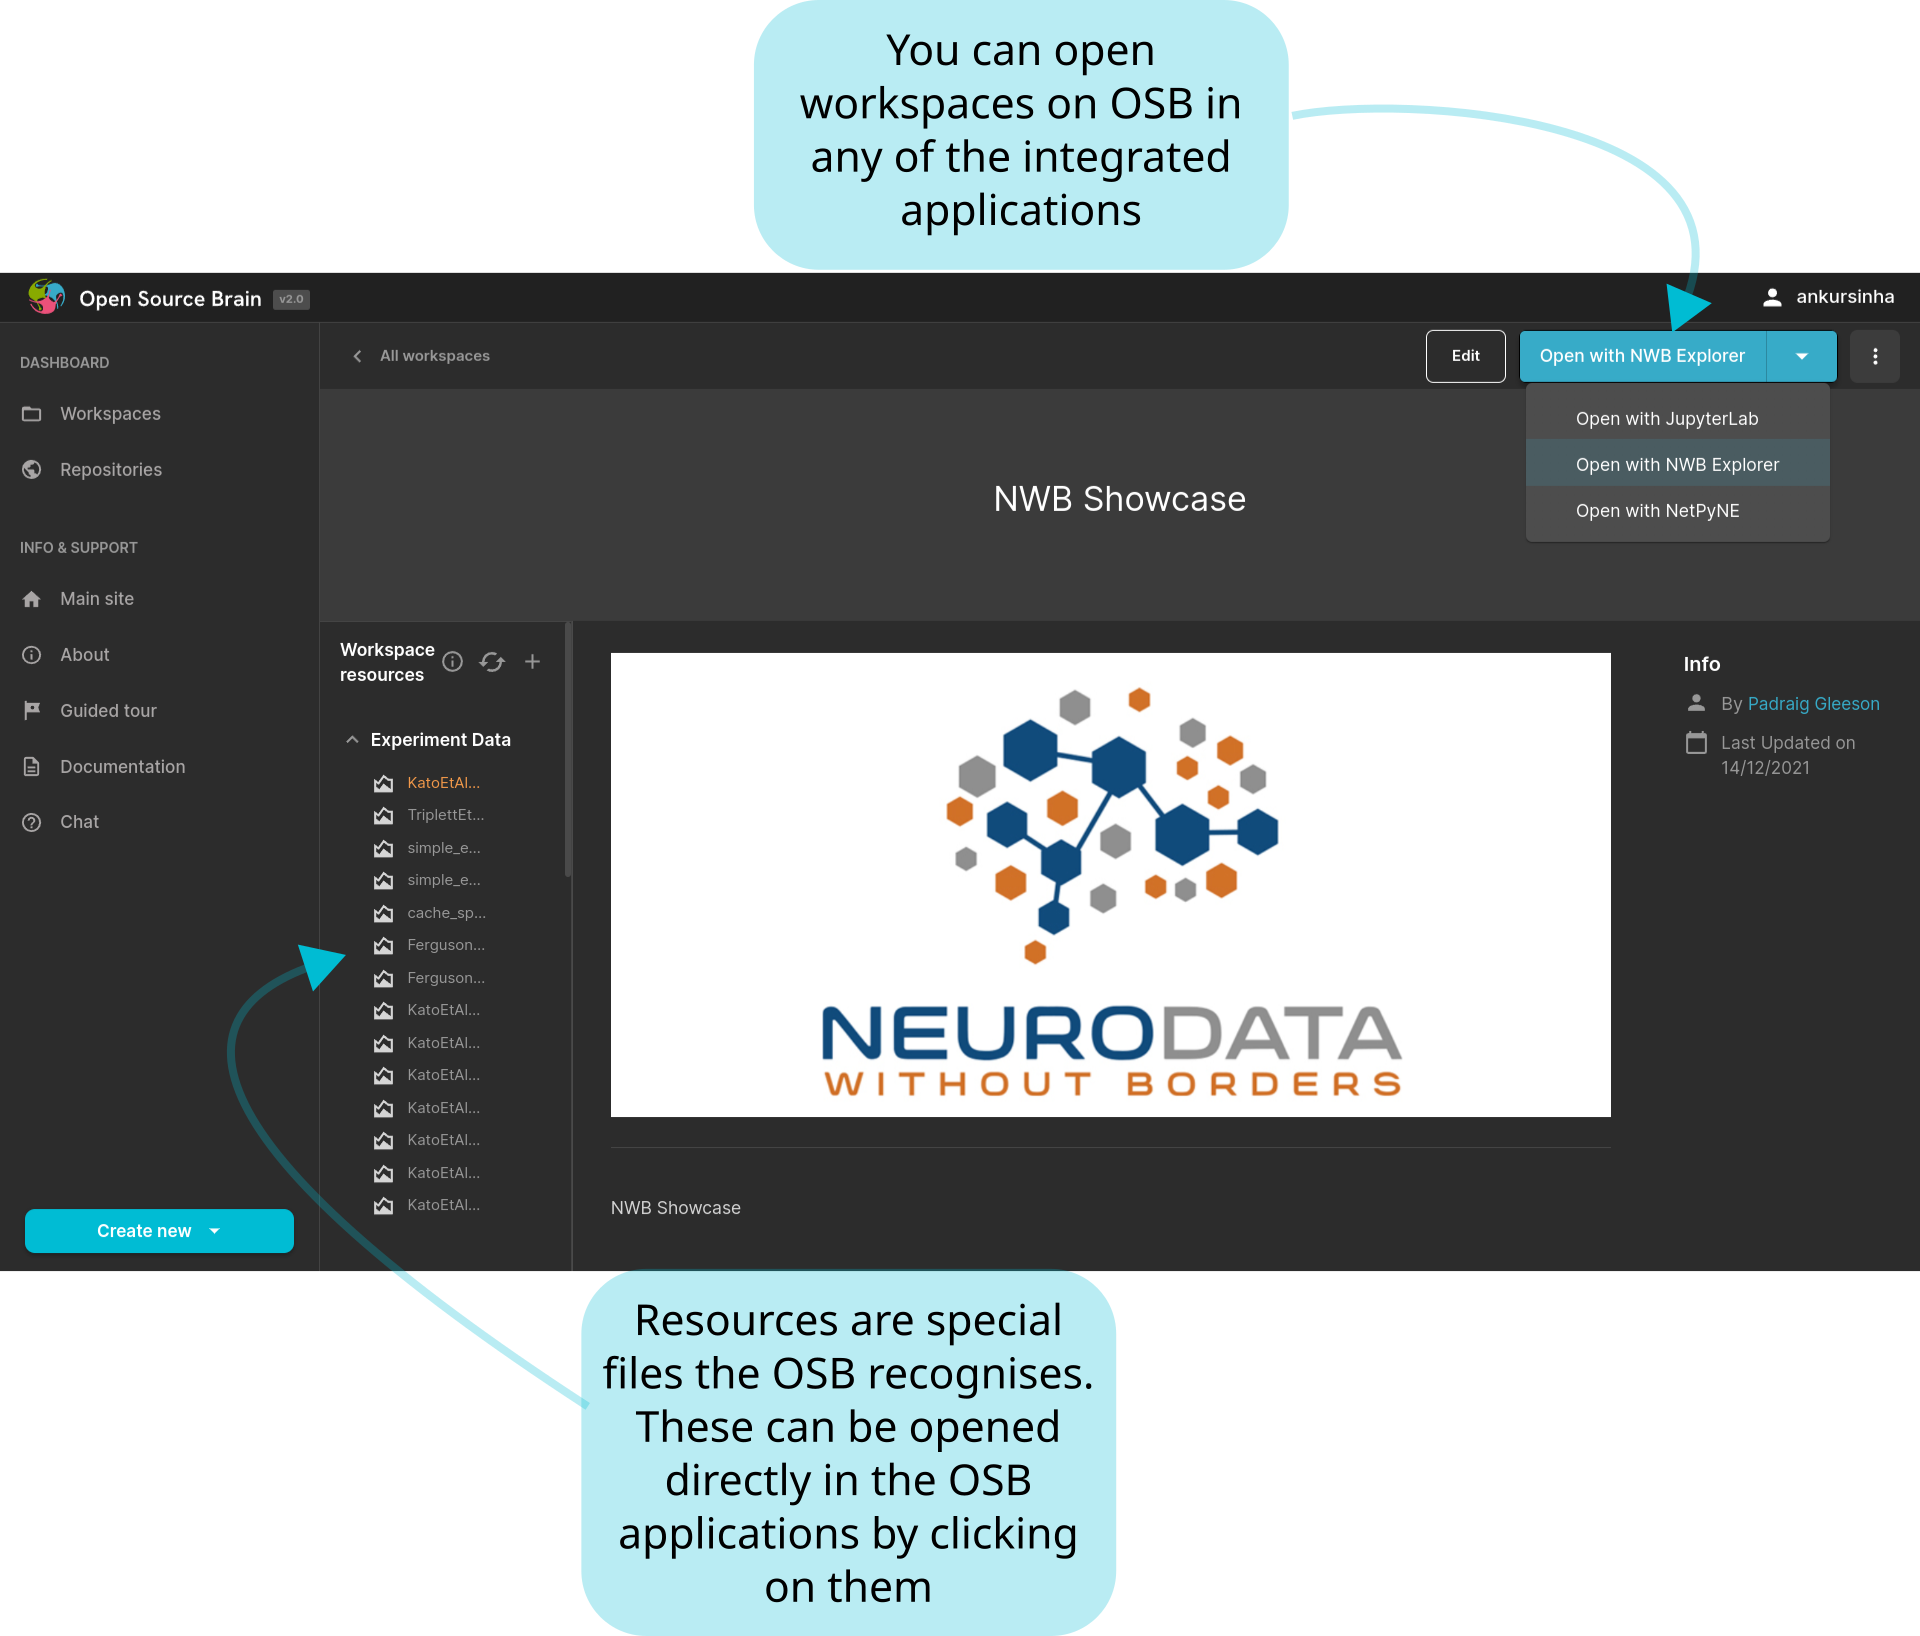
Fig. 8 The workspace information page shows details about the workspace, including what resources it includes.#
Workspaces contain files, some of which are identified as resources. Resources are special files that OSBv2 knows can be opened in one of the OSBv2 applications. These can be seen in the resources side bar in the left hand pane in workspaces and applications.
Clicking on a resource will open it in the associated application:
NWB files (*.nwb files) will open in NWB Explorer
Jupyter Notebooks (*.ipynb files) open JupyterLab
NetPyNE files will open in NetPyNE (coming soon…)
Creating a new workspace#
There are two ways to create workspaces on OSBv2, both available on the OSBv2 homepage.
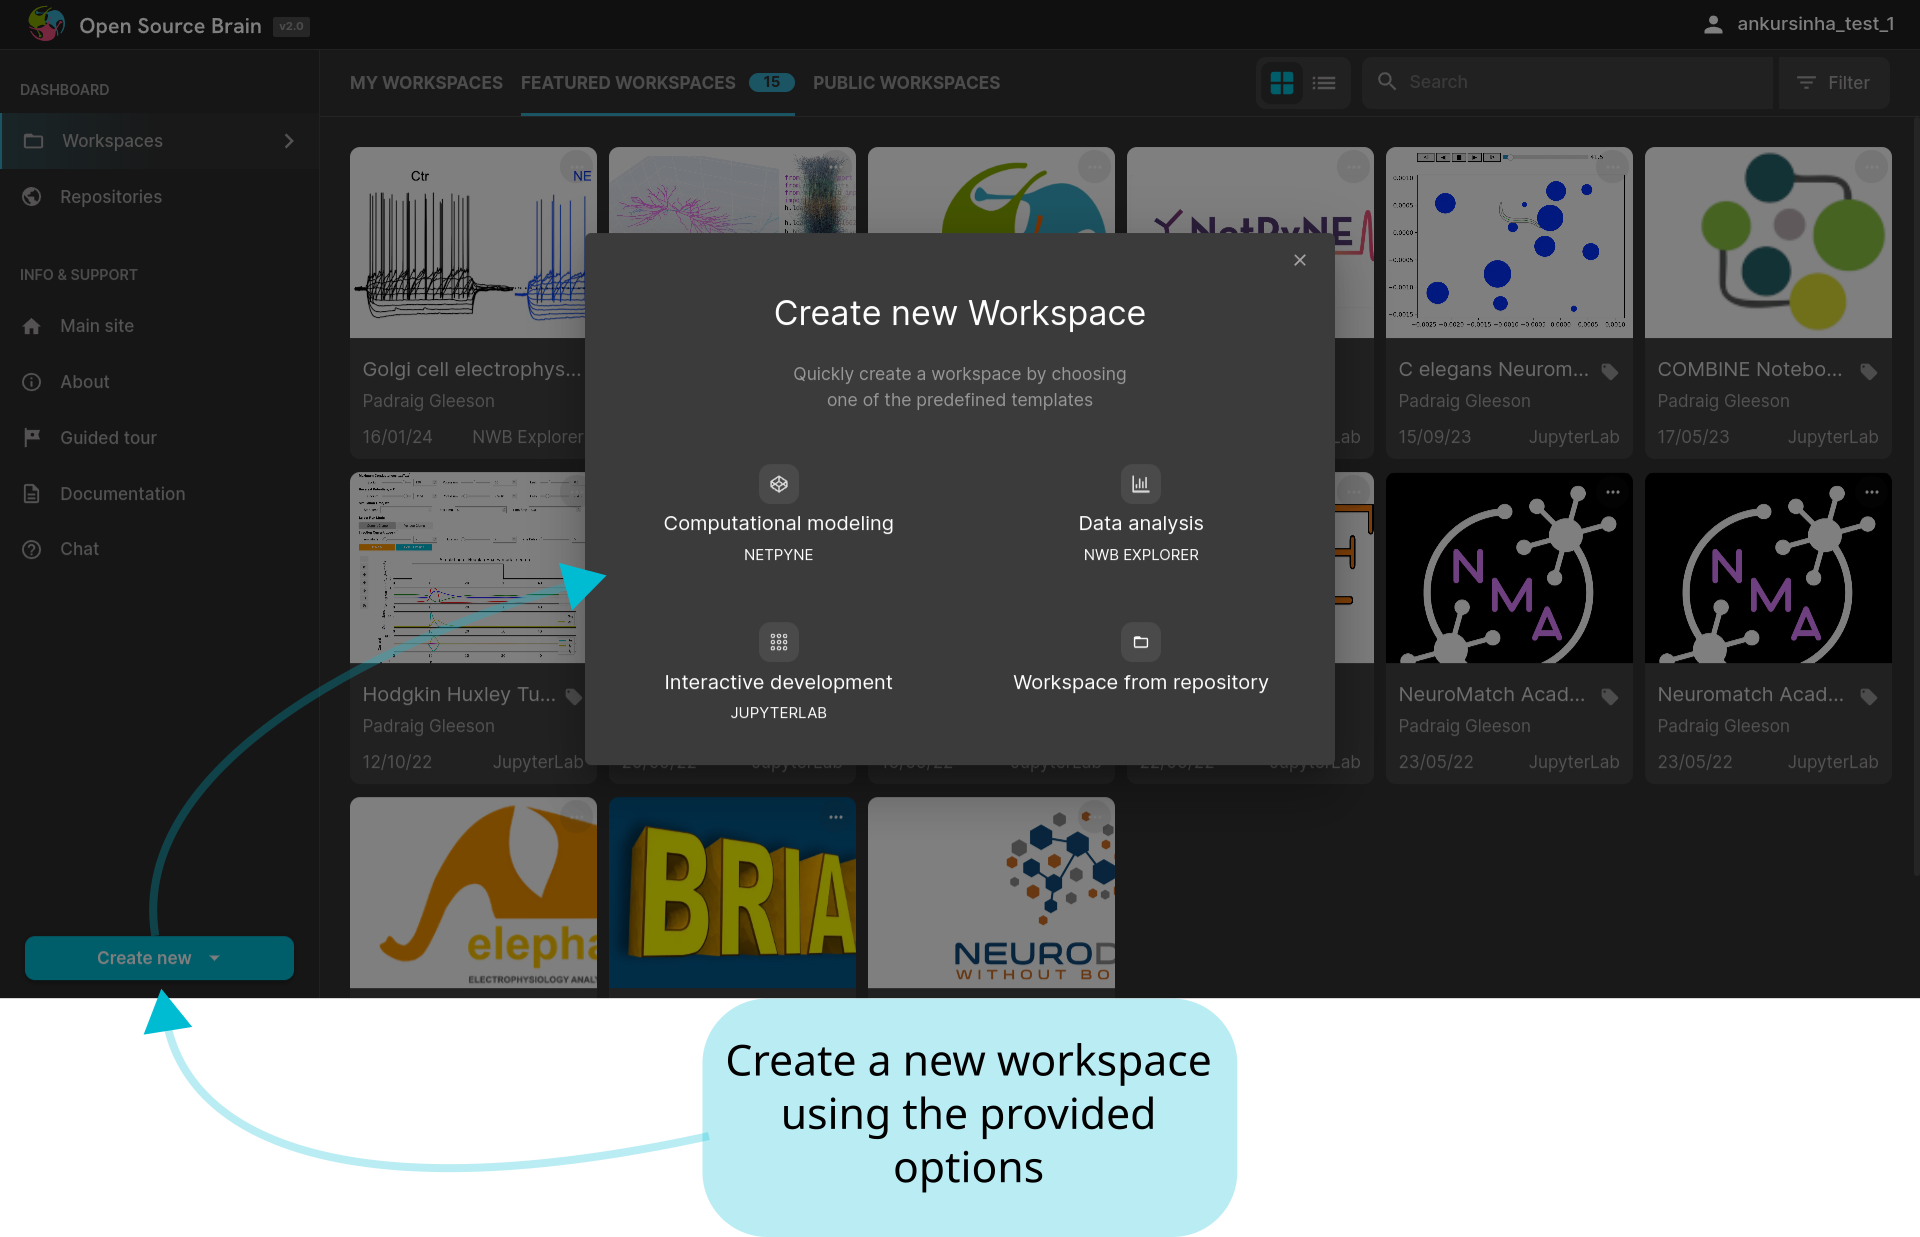
Fig. 9 Workspaces can be created using the options on the OSBv2 homepage.#
You can create a blank/empty workspace without any files/resources if you want to start from scratch (click on: Interactive development/JupyterLab).
Alternatively, you can seed workspaces from files included in a repository that you have access to. Such a workspace can be created from a repository in two ways:
from the OSBv2 homepage by selecting the “Workspace from repository” button
from the repository information page, as explained here.
Clicking on the “Workspace from repository” button on the main page opens the “Create a new workspace” dialogue box. Here, you can select what repository you would want to use to include files from in your new workspace.
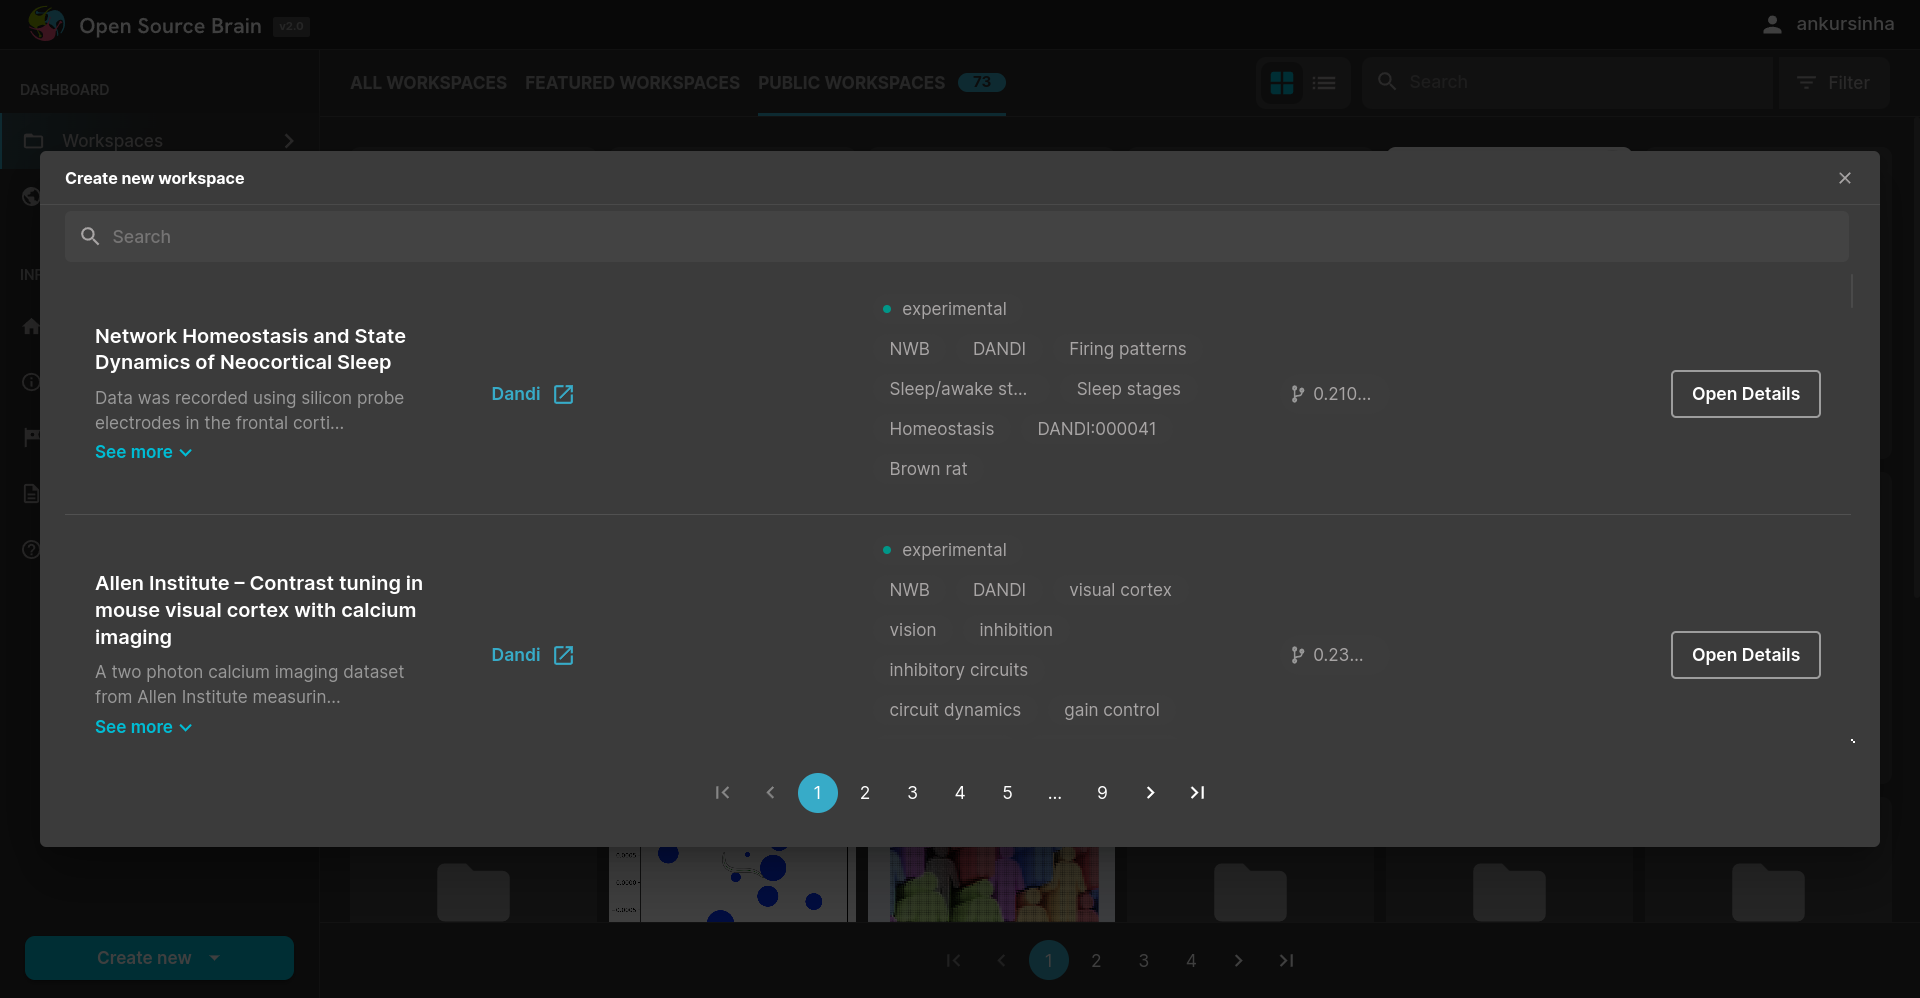
Fig. 10 Select a repository from the list.#
This will take you to the file selection panel. Select the files you want you would like to include, and click “Continue” to proceed.

Fig. 11 Select files to include in your workspace from the list.#
The last screen allows you to set up your workspace. Here, you can add a name, tags, a description, and a thumbnail for your workspace.
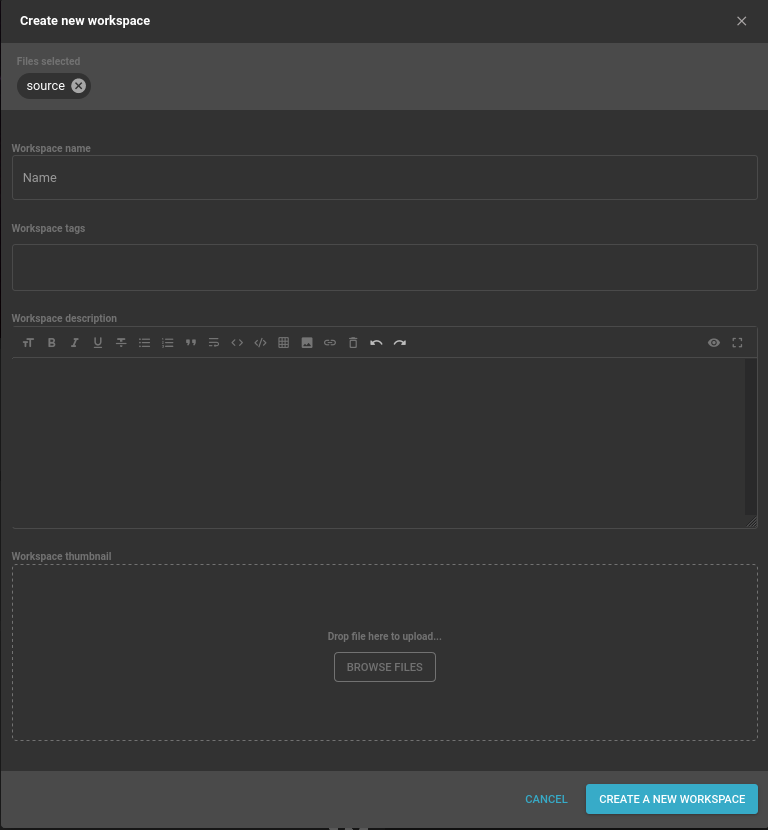
Fig. 12 Add a name, tags, description, and thumbnail for your workspace.#
Your workspace will be added to your list of workspaces, and is ready to use. By default, new workspaces are private. You can select “Make public” from the menu for each workspace to make them public.
Adding files to existing workspaces#
User storage inside a workspace
See information here in the various locations for stored user files inside a workspace
More files can be added to existing workspaces also. One simple way to do this is to open the workspace using the JupyterLab application, and click the Upload Files icon.

Fig. 13 Upload files from JupyterLab.#
You can also download individual files by right clicking on the file in the JupyterLab file browser.
Alternatively, if the file(s) you wish to upload are in a repository, you can select the files to add from the repository page as documented here, or you can go to the workspace information page and add files from there.
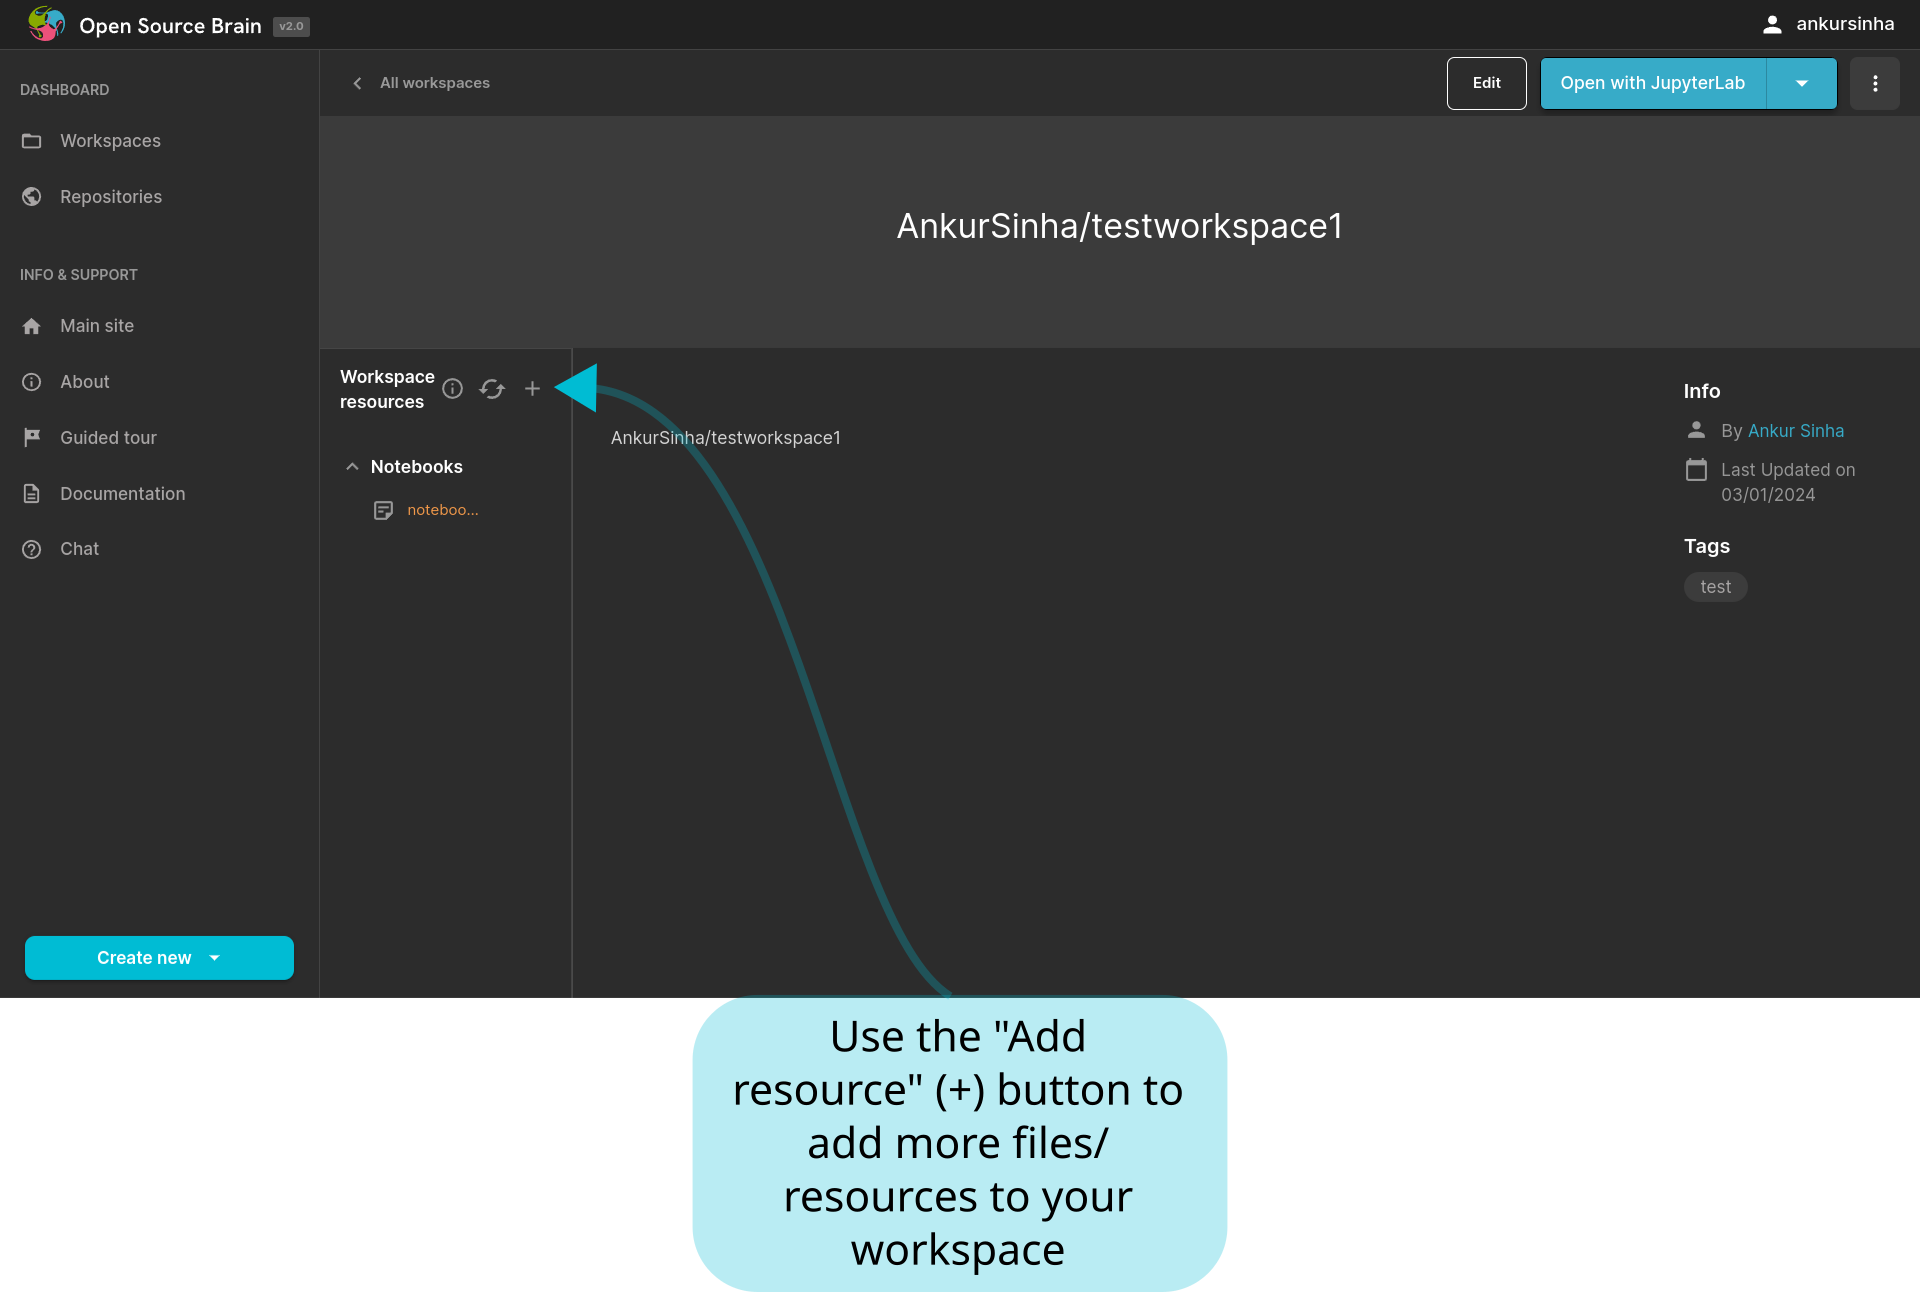
Fig. 14 More files/resources can be added to workspaces.#
This will bring up the “Add new resources” dialogue box, where you can either add files from a URL, or from OSBv2 repositories.
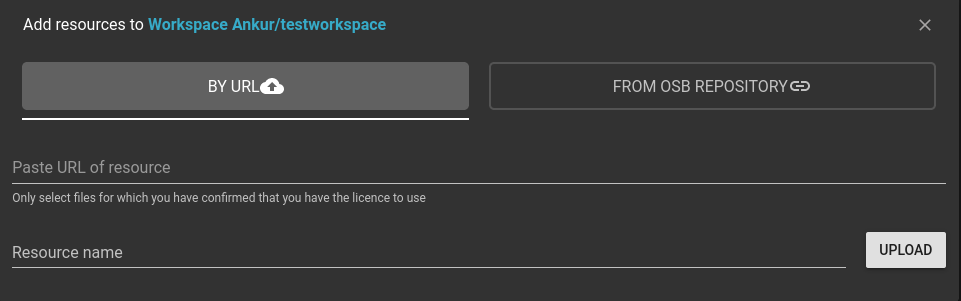
Fig. 15 The “Add new resources” dialogue box allows you to add files from a location, or a repository.#
It is not currently possible to download files/resources using the resources side bar.